Create and Connect Azure Linux VM with SSH Key Pair
You can create a Linux VM in Azure with password or SSH keys. In this blog, we will see how to create a Linux VM using SSH key pair and connect from Azure CLI and Windows Powershell.
For creating Azure VM you need to have a valid Azure account. If you do not have it, you can create using Azure Portal for free.
-
Create SSH Key Pair
SSH Keypair includes two keys one is public and the other one is private. The public key is kept on the server, and the server can be connected only to clients having corresponding private keys. Public keys are added to the authorized_keys file.
ssh-keygen
This is a tool to create new authentication key pair, this key pair can be used for automating logins, single sign-on, and for authenticating host machines. You can use the ssh-keygen command on Azure cloud shell, macOS, Linux, or Windows 10.
Start Azure Cloud shell from Azure Portal and execute the below code to create SSH Keypair.
ssh-keygen \
    -m PEM \
    -t rsa \
    -b 4096 \
    -C "azureuser@testserver" \
    -f ~/.ssh/officekey
This generates an SSH Key pair and store in ~/.ssh directory.
- SSH-Keygen: command to create SSH keys.
- -m PEM: format the key as PEM(Privacy-enhanced Electronic Mail).
- -t rsa: create key type as RSA.
- -b 4096: number of bits in the key. In this case, we are creating 4096 bits key.
- -C "azureuser@testserver": comment for information purpose.
- -f ~/.ssh/officekey: SSH key name. This will create a file with the name officekey.pub. If the SSH key already exists there it will override existing content.
Azure CLI will ask Enter Passphrase. You can secure SSH Keys by using Passphrase, you will have to enter this Passphrase every time while connecting to VM. You can use an SSH agent to configure authentication so that you do not need to re-enter the password after the first successful VM connection.
This command will show output like this.
Generating public/private rsa key pair.
Created directory '/home/user/.ssh'.
Enter passphrase (empty for no passphrase):
Enter same passphrase again:
Your identification has been saved in /home/user/.ssh/officekey.
Your public key has been saved in /home/user/.ssh/officekey.pub.
The key fingerprint is:
SHA256:HCm+GuettwrkeU05i13fUvQfsVtBjjG7Ks7JP21XR8w azureuser@testserver
The key's randomart image is:
+---[RSA 4096]----+
|             o . |
|         .    B  |
|      . o    o.* |
|     . o o   ...E|
|    . . S .  ..+o|
|   o . * + ..o  B|
|    = = +. .+ ..+|
|     B .= o. + . |
|    . ++o*..o .  |
+----[SHA256]-----+
You can list all SSH Keys by using the following command.
ls -al ~/.ssh -
Create Linux VM using Azure CLI with SSH keypair
You can create an Azure Linux Virtual Machine using Azure CLI, Azure Portal, Powershell, or ARM templates. For this tutorial, we will use Azure CLI.
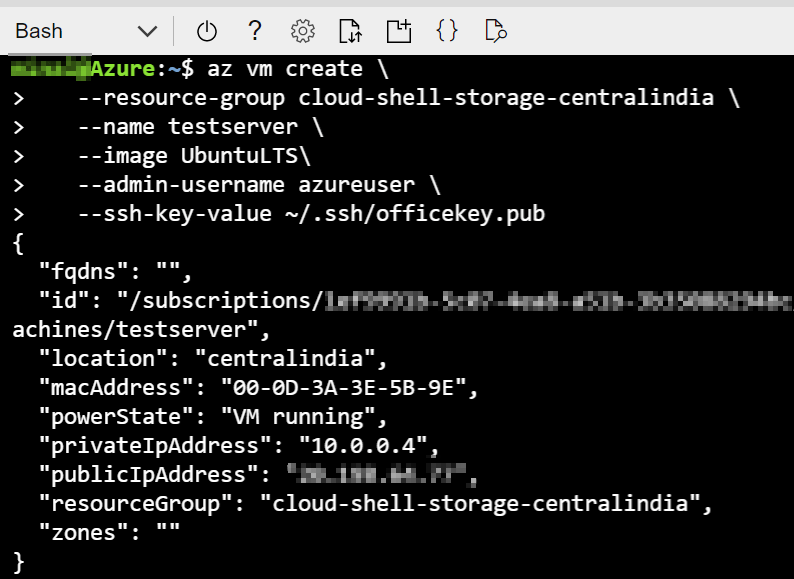
Execute the following command using Azure CLI to create Linux VM with the officekey SSH Key created in the previous step.
az vm create \
   --resource-group cloud-shell-storage-centralindia \
   --name testserver \
   --image UbuntuLTS\
   --admin-username azureuser \
   --ssh-key-value ~/.ssh/officekey.pub
- az vm create: command to create a new Virtual Machine.
- resource-group: resource group to be used for the creation of VM.
- name: name of the virtual machine.
- image: image type of VM. This can be Windows, Linux etc. here is the list of all Azure VM.
- admin-username: Admin username for login to Virtual machine.
-
ssh-key-value: SSH Key file location. You can generate SSH keys while creating VM.
Notice in following CLI code ssh-key-value has replaced with generate-ssh-keys
az vm create \
   --resource-group cloud-shell-storage-centralindia \
   --name testserver \
   --image UbuntuLTS\
   --admin-username azureuser \
   --generate-ssh-keys
Execution takes 1-2 minutes and shows a JSON with newly created Linux VM details as output.
-
Connecting Linux VM using Azure CLI
Your VM is ready to connect. Note the public IP address of VM listed in the JSON file. Or you can search Virtual Machine in Azure Portal -> Click on testserver, this displays details of testserver Linux VM.
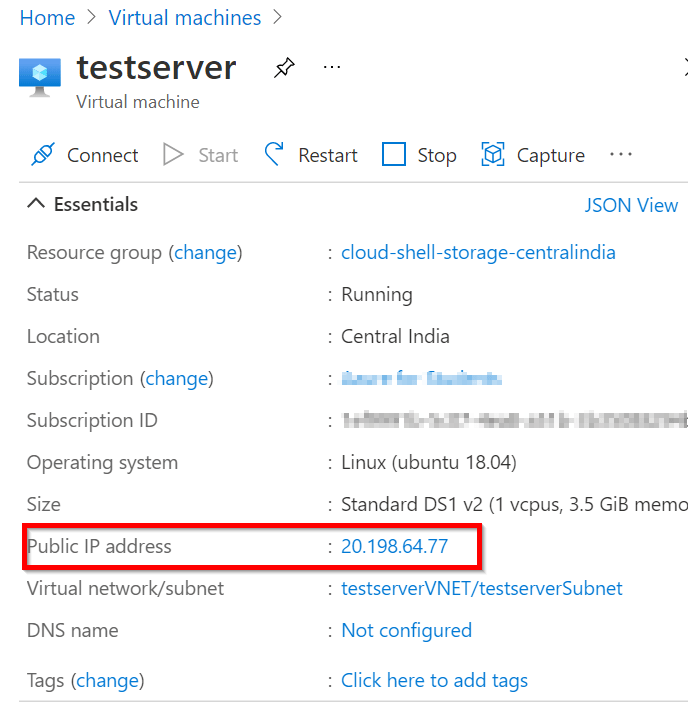
The VM I created has the public IP address - 20.198.64.77 and we have used the admin user as azureuser while creating VM. So connect this Linux VM using Azure CLI you can use the following command.
ssh -i ~/.ssh/officekey azureuser@20.198.64.77
Following are details of the SSH command
- SSH: command to connect Linux VM.
- -i: connect with interactive mode.
- ~/.ssh/officekey: SSH Keypair location and name. ~ indicates home directory.
- azureuser@20.198.64.77: the admin user name of VM in this case it is azureuser, and Public IP address of VM .
-
Generate SSH Key using Powershell
The Linux VM created in previous step can be connect from Windows Powershell commands. In this step you will create a SSH key using Powershell.
Start Powershell from your machine and execute the following command.
ssh-keygen -m PEM -t rsa -b 4096 -f "L:\sshkeys\homeuserkeys"
This creates a SSH key pair and stores it to the location L:\sshkeys. If you do not specify location, SSH key will be stored at default location - C:\Users\<user name>\.ssh
You can verify the SSH key pair, private key in homeuserkeys file and public key in homeuserkeys.pub.
The private key will be like this.
----BEGIN RSA PRIVATE KEY-----
MIIJKQIBAAKCAgEAsnnR3CRGGb6hRLZXMZXMKdFcc3eNg/XE9ZHNDgyiBSP4T2Tw
/RKac6g2qoM3bZfiuq9t44IPzIi2nIN9qVIAywS24Z+w+TSP4KcVi/uiYNiSVJlQ
qpgvM1kVPcmt0BtvHMjvWp6QRFeo5ARi0zhtcoxc/yLWI4oLEJVnXQlU629OsvgL
9CEQHto01GuZ+dBlEB6rTuvZ0PfSJCWGnc0X5X0JzpNwyZLaRqzQxadLsmlwVvxQ
JiBMK/aKUX4cBFi4BjD1OVq1PgAOLs75S9bpe2W2p+KcQwizL6B895L7+K7BDjGJ
3O5E2q4yvU1uh/5xdgkn6pG1cFvdTdufTSXMabbjMuXwP0T0xRQ6b9jIPhSQwraj
0yuyD/xTxJiBHyyPMrtyARvFi0HsVSpBZodIowlxbaBt6GNH613Vs+llu8qjZi+s

--more encrypted text

-----END RSA PRIVATE KEY-----
-
Update SSH details of Azure Linux VM
SSH key generated through Windows Powershell can be used to connect Azure Linux VM. For this, you will have to update VM's SSH details with an SSH public key.
From Azure Portal search for the VM you created in previous steps. Virtual Machines -> testserver.
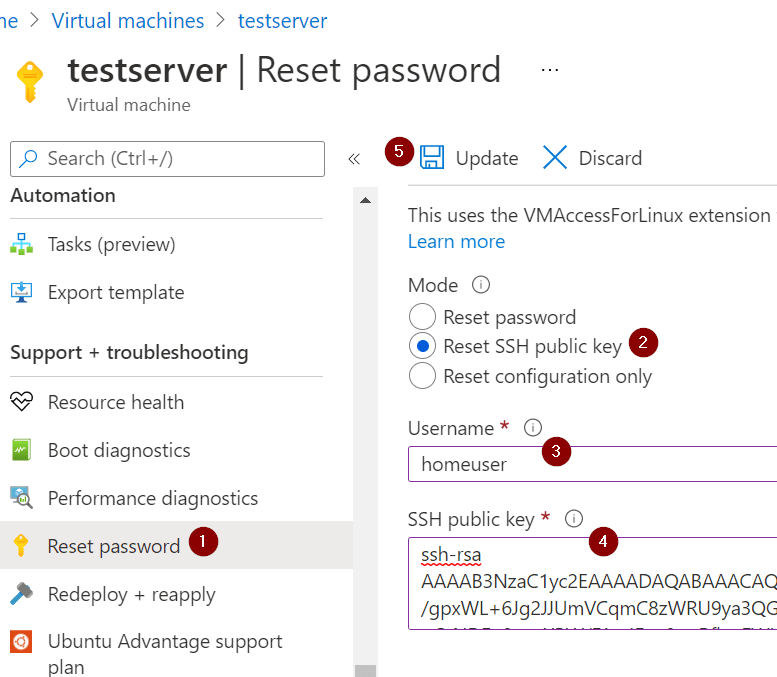
Under Support + Troubleshooting Click on Reset Password.
On the right side of the window, Select Reset SSH Public Key as mode, then for Username enter homeuser.
Copy all the content from homeuserkeys.pub generated on your windows machine, and paste to VM's SSH Public Key as shown in the following picture.
-
Connect Linux VM using Windows Powershell
As SSH Public key content generated on Windows machine is updated to Azure Linux VM SSH and private key resides in local windows machine. You should be able to connect this VM using Windows Powershell.
Open the Powershell as Administrator and execute below command.
ssh -i L:\sshkeys\homeuserkeys homeuser@20.198.64.77 -v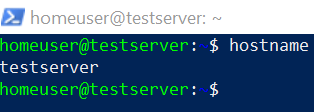
Summary: Now you should be able to connect the same Azure Linux VM from Azure CLI as well as Windows Powershell.
Blog Search

-
Building Scalable Applications: Microservice Architecture Challenges
-
The Paradigm Shift to Low-Code and No-Code Development in Software Engineering
-
How To Use AutoMapper in ASP.NET Core Web API
-
Generate Log using Serilog And Seq In ASP.NET Core MVC 6
-
How to Setup CORS Policies in ASP.NET Core Web API