How To Use AutoMapper in ASP.NET Core Web API
This blog explains how to use AutoMapper in ASP.NET Core Web API project, the configuration of AutoMapper, mapping domain and DTOs, and custom property mapping.
What is AutoMapper
AutoMapper is an object-to-object mapper which helps you to avoid manual mapping of each required property while transferring data from one object to another. Manual mapping is tedious and time-consuming whereas Automapper does mapping in a very clean and readable way. In an MVC application you mostly map model objects to View Models similarly in Web API you map domain objects to DTOs.
Start visual studio and create a new ASP.NET Core Web API project with the name GeekStore. This tutorial uses code written with Visual Studio 2022 and .NET 7. You can follow Getting Started with ASP.NET Core Web API And Entity Framework for detailed step by step implementation.
ASP.NET Core Web API project maps domain objects generated from the database to Data Transfer Objects. Here I am going to use a SQL database having Category and Product tables. The name of the SQL database is GeekStore. You can create this database using GeekStore SQL Script.
Once you are done with the creation of Web API project and database you can follow steps to use AutoMapper.
-
Install AutoMapper NuGet Package
AutoMapper NuGet package developed by Jimmy Bogard, gives you all the required functionality to map object-to-object. Install the following required NuGet packages.
AutoMapper related
- Install-package AutoMapper
- Install-package AutoMapper.Extensions.Microsoft.DependencyInjection
EF Core related NuGet packages to deal with GeekStore the database.
- Install-package Microsoft.EntityFrameworkCore
- Install-package Microsoft.EntityFrameworkCore.Sqlserver
- Install-package Microsoft.EntityFrameworkCore.Tools
-
Generate Domain Model
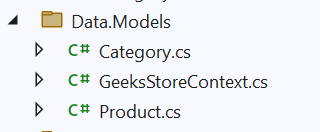
Generate Domain Models from GeekStore database using EF Core Database First approach. This command will generate Model classes for Category and Product tables and GeekStoreContext.
Replace connection string and execute this command in Nuget Package Manager Console
Scaffold-DbContext "<connection string>"
-Provider Microsoft.EntityFrameworkCore.SqlServer
-OutputDir Data.Models
Generated domain classes will be added as
-
Create Data Transfer Objects (DTO)
Web API is responsible for transferring data to the client. Data contained in domain objects might be different than the data that needs to be transferred to clients. This is where AutoMapper helps to map domain objects to DTO.
We already created Domain objects in the previous step, we will create a different DTO to cater different functionality.
Create a folder with the name DTOs. Here we will be creating DTO for Category and Product so create two different folders with the name Category and Product under the DTO folder.
Add the following classes under DTOs/Category folder
.-
GetCategoryDetailsDto.cs
public class GetCategoryDetailsDto { public int Id { get; set; } public string CategoryName { get; set; } = string.Empty; } -
UpdateCategoryDiscountDto.cs
public class UpdateCategoryDiscountDto { public int Id { get; set; } public float CategoryDiscount { get; set; } } - GetCategoryProductsDto.cs
public class GetCategoryProductsDto
{
    public int Id { get; set; }

    public string CategoryName
        { get; set; } = string.Empty;

    public int CategoryDiscount { get; set; }

    public List<ProductDto>
        Products {  get; set; }
}
Add Product related DTOs under DTOs/Product folder.
-
ProductDto.cs
namespace GeekStore.API.Core.DTOs.Product
{
    public class ProductDto
    {
        public int Id { get; set; }
        public int CategoryId { get; set; }
        public string CategoryName { get; set; };
        public string ProductName { get; set; };
        public int Qty { get; set; }
        public decimal Price { get; set; }
    }
}
-
GetCategoryDetailsDto.cs
-
Setup AutoMapper configuration
Create a folder with name Configurations and add a class to it with name MapperConfig.cs. This class needs to be inherited from Profile class of AutoMapper.
Add the following mapping configurations. This creates a mapping between domain objects to different DTOs.
using AutoMapper;

namespace GeekStore.API.Core.Configurations
{
    public class MapperConfig : Profile
    {
        public MapperConfig()
        {
            CreateMap<Category,
                GetCategoryDetailsDto>().ReverseMap();
            CreateMap<Category,
                UpdateCategoryDiscountDto>().ReverseMap();
            CreateMap<Category,
                GetCategoryProductsDto>();
            CreateMap<Product,
                ProductDto>().ReverseMap();
        }
    }
}
This code maps the Category domain object to GetCategoryDetailsDto DTO, and ReverseMap will map vice versa.
-
Inject AutoMapper Dependency
The MapperConfig file having AutoMapper configuration needs to be injected in the .NET pipeline. Add this code to Program.cs file. For info please check How to Implement Dependency Injection in .NET Core.
builder.Services.AddAutoMapper(typeof(MapperConfig));You may have multiple configurations files like one for the category and another for product objects, you can inject like this.
builder.Services.AddAutoMapper(typeof(CategoryMapperConfig),
                typeof(ProductMapperConfig)
            );
You also need to inject some other code to connect the SQL server and handle API controllers.
var connectionString =
    builder.Configuration.GetConnectionString("GeekStore");

builder.Services.AddDbContext<GeeksStoreContext>(options => {
    options.UseSqlServer(connectionString);
});

builder.Services.AddControllers();

var app = builder.Build();
app.MapControllers();
Invoke Mapped object in API Controller
AutoMapper configuration is done and ready to use. To actual use of AutoMapper we will implement ASP.NET Core Web API CRUD Operations. Add a new folder with name Controllers, and add CategoryController API controller under this folder.
Inject Dependency of AutoMapper and Context to CategoryController through the constructor.
namespace GeekStore.API.Core.Controllers
{
    [Route("api/[controller]")]
    [ApiController]
    public class CategoryController : ControllerBase
    {
        private readonly IMapper _mapper;
        private readonly GeeksStoreContext _context;

        public CategoryController(IMapper mapper,
            GeeksStoreContext context)
        {
            this._mapper = mapper;
            this._context = context;
        }
    }
}
Map List
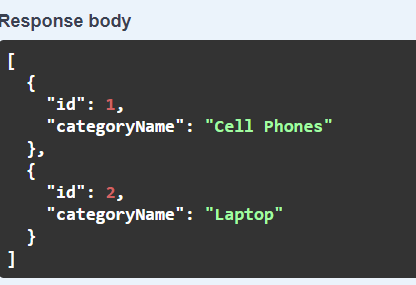
Here Database Context gets a list of Category domain object, AutoMapper converts it to a list of GetCategoryDetailsDto object, and return it to the client.
[HttpGet("GetCategories")]
public async Task<ActionResult<List<GetCategoryDetailsDto>>> GetCategories()
{
    var categories = await this._context.Categories.ToListAsync();
    var records = _mapper.Map<List<GetCategoryDetailsDto>>(categories);
    return Ok(records);
}
Here is the list of GetCategoryDetailsDto mapped by AutoMapper.
Include child
This code gets a List of Categories including a List of Product domain models and AutoMapper maps it to a List of GetCategoryDetailsDto.
[HttpGet("GetCategoryProducts/{categoryID}")]
public async Task<ActionResult<GetCategoryDetailsDto>> GetCategoryProducts(int categoryID)
{

    var products = await this._context.Categories.Where(c => c.Id == categoryID)
        .Include(_ => _.Products).ToListAsync();

    var result = _mapper.Map<List<Category>, List<GetCategoryProductsDto>>(products);
    return Ok(result);
}
One to One Mapping
Get one Category domain object and map it to GetCategoryDetailsDto
[HttpGet("GetCategoryDetails/{categoryID}")] public async Task<ActionResult<GetCategoryDetailsDto>> GetCategoryDetails(int categoryID) { var category = await this._context.Categories.FindAsync(categoryID); if (category == null) { throw new Exception($"CategoryID {categoryID} is not found."); } var categoryDto = this._mapper.Map<GetCategoryDetailsDto>(category); return Ok(categoryDto); }-
HttpPost OR HttpPut
As of now, we have seen how to use AutoMapper for converting domain objects to DTOs while reading data from the database and pass to the API client. In this step, we will see how to use AutoMapper to convert DTOs to Domain objects for inserting or updating data in the database.
CategoryController that accepts a DTO, AutoMapper maps with Category domain model.
As we already have created mapping with ReverseMap as shown in the code, we do not need to create a different mapping for DTOs to the domain.
CreateMap<Category, GetCategoryDetailsDto>()
    .ReverseMap();
Add a Web API Action method as follows. The highlighted code maps updateCategoryDiscount DTO to the category domain model.
[HttpPut("{id}")]
public async Task<IActionResult> UpdateCategoryDiscount(int id,
    UpdateCategoryDiscountDto updateCategoryDiscount)
{
    var category = await this._context.Categories.FindAsync(id);

    if (category == null)
    {
        throw new Exception($"CategoryID {id} is not found.");
    }

    this._mapper.Map(updateCategoryDiscount, category);

    var result  = this._context.Categories.Update(category);

    await this._context.SaveChangesAsync();

    return Ok();
}
-
Custom property Mapping using AutoMapper
Sometimes property mapping is not going to be mapped directly one to one like View Model has property the Name however Data Model has two properties for name as First Name and Last Name so while mapping data models to view model two properties need to concatenate.
In our Category and Product example, the discount is defined in the Category, and Price is defined in the Product object. So to apply a Category discount to its Products we will have to use AutoMapper Custom Mapping
Custom Mapping can be done in multiple ways.
AfterMap OR BeforeMap
You can implement custom logic using AfterMap and BeforeMap. This will apply Category Discount to the List of Products.
Add this mapping to the MapperConfig file.
CreateMap<Category, GetCategoryProductsDto>() .AfterMap((src, dest) => { dest.Products.ForEach(x => x.Price -= src.CategoryDiscount); });-
ForMember, MapFrom
ForMember configures the value of the destination object from custom logic. This logic can be built by source properties or anything else.
Map Price of each Product from List of Product collection using ForMember and MapFrom.
CreateMap<Product, ProductDto>() .ForMember( dest => dest.Price, opt => opt.MapFrom ((src, dest, member, context) => src.Price - src.Category.CategoryDiscount)); -
IValueResolver
AutoMapper allows for configuring custom value resolvers for destination members using IValueResolver interface. You can build custom logic for destination properties by implementing this interface.
To set the Product price after calculating the category discount, add a new class under the folder Configurations. The name of the class will be GetProductDiscount.
This code returns a decimal value by deducting the CategoryDiscount of Product object.
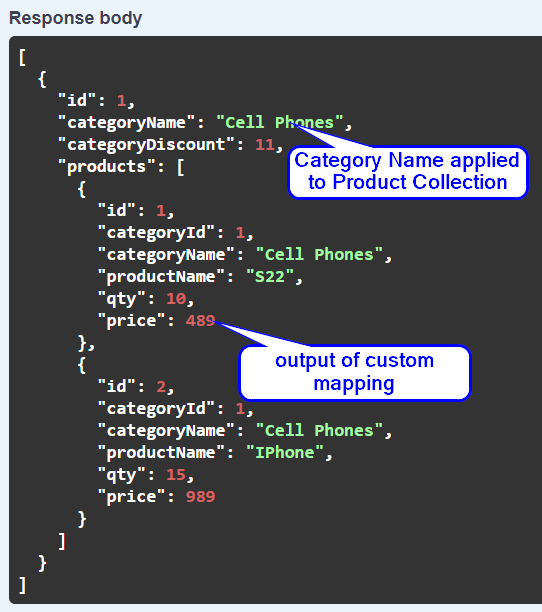
namespace GeekStore.API.Core.Configurations
{
    public class GetProductDiscount
        : IValueResolver<Product, ProductDto, decimal>
    {
        public decimal Resolve(Product source,
            ProductDto destination, decimal destMember,
            ResolutionContext context)
        {
            return source.Price - source.Category.CategoryDiscount;
        }
    }
}
Use this while configuring mapping between Product and ProductDTO.
CreateMap>Product, ProductDto>()
    .ForMember(dest => dest.Price,
        source => source.MapFrom<GetProductDiscount>())
    .ForMember(dest => dest.CategoryName,
        source => source.MapFrom(s => s.Category.CategoryName));
Here is the response of Custom mapping when you execute the GetCategoryProducts Web API method.

Blog Search

-
Building Scalable Applications: Microservice Architecture Challenges
-
The Paradigm Shift to Low-Code and No-Code Development in Software Engineering
-
How To Use AutoMapper in ASP.NET Core Web API
-
Generate Log using Serilog And Seq In ASP.NET Core MVC 6
-
How to Setup CORS Policies in ASP.NET Core Web API