

To implement dependency injection in .NET Core, register your services in the built-in container (IServiceCollection) with a lifetime, then declare each dependency as a constructor parameter — the framework resolves and injects it for you. .NET 10 ships this container as part of the host, so you need no third-party library to get loose coupling, testability, and inversion of control. In this article you will register an interface and its implementation, inject it into controllers and minimal-API handlers, wire up the options pattern, use keyed services, and swap in a fake for testing.
What is dependency injection and why use it?
Dependency injection (DI) is a pattern where a class receives the objects it depends on from the outside instead of creating them itself. Rather than calling new EmailSender() inside a class, you accept an IEmailSender in the constructor and let a container supply the concrete type at runtime.
This gives you three concrete benefits:
- Loose coupling — your class depends on an interface, not a specific implementation, so you can change the implementation without touching the consumer.
- Testability — you can pass a fake or mock in a unit test instead of hitting a real database or network.
- Inversion of control — the framework owns the creation and lifetime of objects, so wiring lives in one place instead of being scattered through your code.
The alternative — each class newing up its own collaborators — quietly hardens your code. A class that constructs its own SqlConnection can only ever talk to SQL Server, and a test for it must spin up a real database. DI breaks that by making the dependency a parameter, and the container is simply the machinery that fills those parameters in for you at runtime. Once you internalize this, most "how do I share this object" questions answer themselves: register it and inject it.
The built-in container in .NET 10
.NET Core, and now .NET 10, includes a first-class DI container. You do not need Autofac, Ninject, or any other library to get started. Two abstractions matter: IServiceCollection, where you register services during startup, and IServiceProvider, which resolves them at runtime. The host builds the provider from the collection for you.
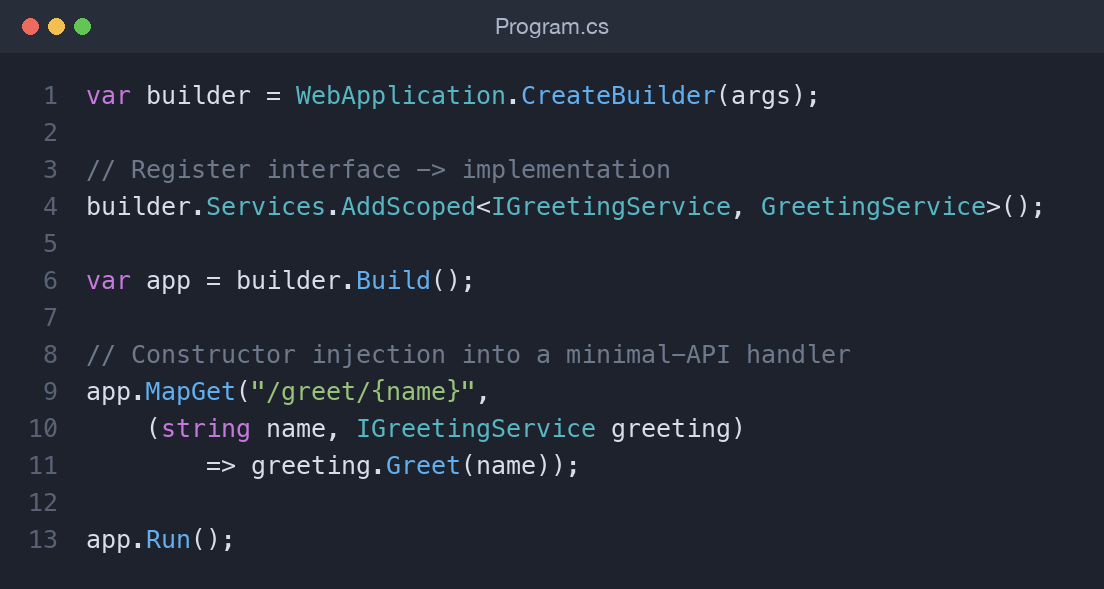
Everything is registered in Program.cs before the app is built:
var builder = WebApplication.CreateBuilder(args);

builder.Services.AddScoped<IGreetingService, GreetingService>();

var app = builder.Build();
Under the hood, builder.Services is an IServiceCollection — essentially a list of ServiceDescriptor entries describing what type maps to what and for how long. When you call Build(), the host compiles that list into an IServiceProvider. You rarely touch the provider directly in application code; the framework resolves the root objects (controllers, handlers, hosted services) and injection cascades down from there. Registering by interface, and by the same interface you inject, is the whole contract.
Register an interface and its implementation
The typical registration maps an interface to a concrete type. You choose a lifetime that controls how long a resolved instance lives:
// A new instance every time it is requested
builder.Services.AddTransient<IClock, SystemClock>();

// One instance per HTTP request (or per DI scope)
builder.Services.AddScoped<IGreetingService, GreetingService>();

// One instance for the whole application
builder.Services.AddSingleton<ICache, MemoryCache>();
With the mapping in place, consumers ask for the interface through their constructor. This is constructor injection, the preferred style because dependencies are explicit and the object is never in a half-built state. A primary constructor keeps it terse in C# 14:
public class GreetingService(ILogger<GreetingService> logger) : IGreetingService
{
    public string Greet(string name)
    {
        logger.LogInformation("Greeting {Name}", name);
        return $"Hello, {name}!";
    }
}
Inject into controllers and minimal-API handlers
In an MVC or API controller, list the dependency as a constructor parameter and the framework injects it when it creates the controller:
[ApiController]
[Route("api/[controller]")]
public class GreetController(IGreetingService greeting) : ControllerBase
{
    [HttpGet("{name}")]
    public IActionResult Get(string name) => Ok(greeting.Greet(name));
}
Minimal APIs use method injection instead — any handler parameter that the container can resolve is supplied automatically:
app.MapGet("/greet/{name}", (string name, IGreetingService greeting)
    => greeting.Greet(name));
Notice there is nothing to configure for this to work: route values, query parameters, and injected services all arrive as ordinary parameters, and the framework decides which is which. The same principle extends to IHostedService background workers and IHttpClientFactory typed clients — anything the host creates for you receives its dependencies through the constructor.
A quick note on lifetimes
The three lifetimes — transient, scoped, and singleton — decide when the container creates and disposes instances. A common bug is a captive dependency: injecting a scoped service into a singleton keeps the scoped instance alive far too long. As a rule, do not depend "upward" from a longer-lived service into a shorter-lived one. Lifetimes deserve their own treatment; see the dedicated post on service lifetimes for the full picture.
Configure services with the options pattern
The options pattern binds a section of configuration to a strongly typed class and injects it as IOptions<T>. Define the class, bind it, then depend on the options:
public class SmtpOptions
{
    public string Host { get; set; } = "";
    public int Port { get; set; }
}

builder.Services.Configure<SmtpOptions>(
    builder.Configuration.GetSection("Smtp"));
public class EmailSender(IOptions<SmtpOptions> options)
{
    private readonly SmtpOptions _cfg = options.Value;
    // use _cfg.Host, _cfg.Port
}
Prefer IOptions<T> for values fixed at startup. When configuration can change while the app runs, inject IOptionsSnapshot<T> (recomputed per scope) or IOptionsMonitor<T> (with change notifications) instead. This keeps configuration out of your classes as magic strings and gives you one typed object to test against.
For HTTP dependencies, register a typed client so the HttpClient and its policies come from the factory rather than being newed up by hand:
builder.Services.AddHttpClient<GitHubClient>(c =>
    c.BaseAddress = new Uri("https://api.github.com"));
Use keyed services (new in .NET 8 and 9)
Sometimes you need more than one implementation of the same interface and want to pick one by a key. Keyed services, introduced in .NET 8 and refined in .NET 9, solve this without a factory:
builder.Services.AddKeyedScoped<IGreetingService, FormalGreeting>("formal");
builder.Services.AddKeyedScoped<IGreetingService, CasualGreeting>("casual");
Resolve a specific one with the [FromKeyedServices] attribute:
app.MapGet("/formal/{name}",
    ([FromKeyedServices("formal")] IGreetingService g, string name)
        => g.Greet(name));
Replace the container with a third-party one
The built-in container is deliberately minimal. If you need advanced features like assembly scanning, decorators, or property injection, you can plug in another container. Scrutor extends the built-in one with convention-based registration:
builder.Services.Scan(scan => scan
    .FromAssemblyOf<IGreetingService>()
    .AddClasses(c => c.AssignableTo<IGreetingService>())
    .AsImplementedInterfaces()
    .WithScopedLifetime());
Autofac replaces the container entirely through UseServiceProviderFactory, letting you keep your existing registrations while adding Autofac modules on top. For most applications, though, the built-in container plus Scrutor is enough, and staying on the built-in one keeps startup simple and dependencies few.
Test by injecting a fake
Because your classes depend on interfaces, a unit test just constructs the class with a fake implementation — no container required:
[Fact]
public void Greet_returns_greeting()
{
    var sut = new HomeService(new FakeGreeting());
    Assert.Equal("Hi!", sut.Run());
}

class FakeGreeting : IGreetingService
{
    public string Greet(string name) => "Hi!";
}
This is the payoff of DI: the code under test has no hidden dependency on real infrastructure. You can use a mocking library such as NSubstitute or Moq for richer verification, but a hand-written fake is often clearer for simple interfaces. Either way, the class never knows or cares that it received a stand-in rather than the production type.
Key takeaways
- DI supplies dependencies from the outside, giving you loose coupling, testability, and inversion of control.
- .NET 10 has a built-in container (
IServiceCollection/IServiceProvider) — no third-party library needed. - Register an interface-to-implementation mapping with
AddTransient,AddScoped, orAddSingleton, then use constructor injection. - Controllers use constructor injection; minimal APIs use method (parameter) injection.
- The options pattern (
IOptions<T>+Configure) injects strongly typed configuration; typed clients injectHttpClient. - Keyed services select among multiple implementations; Scrutor or Autofac cover advanced scenarios.
Frequently asked questions
Do I need a third-party DI container in .NET 10?
No. The built-in container in Microsoft.Extensions.DependencyInjection handles interface-to-implementation mapping, lifetimes, options, and keyed services. Reach for Autofac or Scrutor only when you need features like assembly scanning or decorators.
What is the difference between AddScoped, AddTransient, and AddSingleton?
Transient creates a new instance on every request, scoped creates one per HTTP request (or DI scope), and singleton creates a single instance for the app's lifetime. Choosing the wrong one can cause captive dependencies or unexpected shared state.
How does constructor injection actually work?
When the container creates a class, it inspects the constructor parameters, resolves each registered type, and passes the instances in. You never call new on the dependency yourself, which is what makes the class easy to test.
What are keyed services in .NET?
Keyed services, added in .NET 8 and available in .NET 10, let you register several implementations of one interface under string or object keys and resolve a specific one with [FromKeyedServices]. They replace hand-written factory switches.
Comments (0)
No comments yet — be the first to share your thoughts.