jQuery UI DatePicker Examples in MVC
jQuery UI DatePicker plugin
jQuery UI DatePicker plugin allows you to select a date easily. You can customize the format, language of date to be displayed, restrict the selection of dates, show buttons, or navigation to navigate to different month or year.
It gives you the DatePicker method. Using options of this you can change CSS, date format, language. You can attach datepicker to input control where the user will be able to select date from datepicker and also enter date to the input control. For inline display of datepicker attach it with span or div element.
Create New MVC Application:
Follow ASP.NET MVC with Model tutorial to create a basic MVC application with a simple model.
Open Customer.cs file from Models folder and update its content with below property to accept Date value.
public class Customer
{
    [Display(Name="Join Date")]
    public string JoinDate { get; set; }
}
Controller Action Method
In this step, you will update Controller action methods to display or update model values. Open HomeController and update its action methods as shown below.
public class HomeController : Controller
{
    //
    // GET: /Home/
    public ActionResult Index()
    {
        Customer cust = new Customer();
        cust.JoinDate = DateTime.Now.ToShortDateString();
        return View(cust);
    }

    [HttpPost]
    public ActionResult Index(Customer cust)
    {
        string joinDate = cust.JoinDate;
        return View();
    }
}
Two Index action methods are used one for GET and the other for POST requests.
View with jQuery DatePicker
In this step, you will create a view that will use the jQuery UI library to use UI DatePicker and its methods, different formats.
Open Index.cshtml file from Views -> Home folder. Add the below HTML.
    <head>
    <link rel="stylesheet" href="//code.jquery.com/ui/1.11.2/themes/smoothness/
    jquery-ui.css"/>
    </head>
    @{
        ViewBag.Title = "Index";
    }
    @model JQueryDatePicker.Models.Customer
    @using (Html.BeginForm("index", "home"))
    {
    <div style="width:100%">
    <div style="width:20%">
    <a href="https://geeksarray.com">
    <img src="https://geeksarray.com/images/geeksarray.png"
    alt="geeksarray.com" /></a>
    </div>
    <div style="width:60%">
    <h2>
    jQuery DatePicker Example</h2>
    </div>
    </div>
    <div>
    @Html.LabelFor(c => c.JoinDate)
      @Html.TextBoxFor(c => c.JoinDate, new { id = "datepicker" })
    </div>
    <br />
    <div>
    <button type="submit" class="btn btn-default">
    Submit</button>
    </div>

    }
    <script src="//code.jquery.com/jquery-3.5.1.min.js"
    type="text/javascript"></script>
    <script src="//code.jquery.com/ui/1.12.1/jquery-ui.min.js"
    type="text/javascript"></script>
    <script type="text/javascript">
    $(function () {
    $("#datepicker").datepicker({

    });
    });
    </script>
This HTML uses jQuery UI CSS and script files which help you to display DatePicker control on your view. You have TextBox with id datepicker on a view that is bound to model JoinDate property.
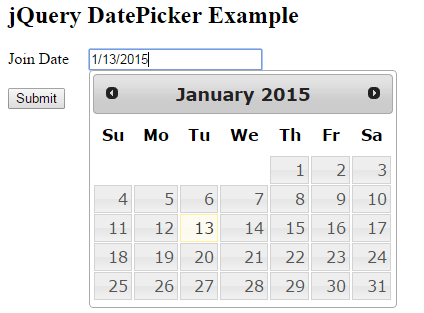
The jQuery function $("#datepicker").datepicker({ }); use jQuery library and shows the Datepicker when you click on TextBox.
Now execute the application and click on textbox you will see the below output
Format Date
If you want to display date in specific format you can use dateFormat attribute of datepicker. The below code shows you how to use it.
<script type="text/javascript">
    $(function () {
        $("#datepicker").datepicker({
                dateFormat: 'DD, d MM, yy' })

    });
</script>
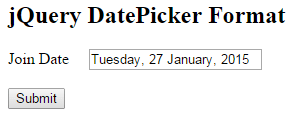
It displays long date with day, date, month in word and year format.
Restrict Selectable Dates of DatePicker
You can have a full control over dates to be selected by the user. You can use mindate and maxdate attributes of datepicker to enable specific dates for selection.
mindate is the value of the start date and max date is the end date of selectable dates. If dates can be previous to the current date you can use - sign values. The below code shows how to restrict dates from being selected
<script type="text/javascript">
    $(function () {
        $("#datepicker").datepicker({
                minDate: -10, maxDate: "+1M +10D", numberOfMonths: 2 });
    });
</script>
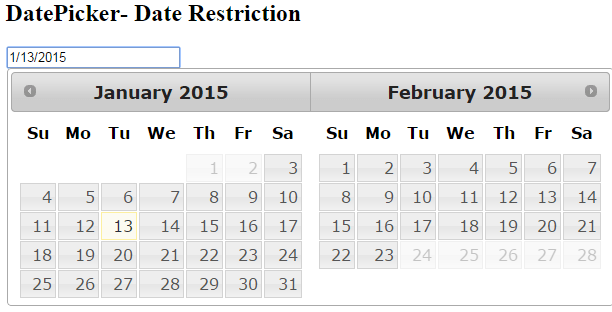
Dates can be selected only from the previous 10 days of the current date to next 1 month and 10 days of current date.
Custom buttons on Datepicker Button Panel
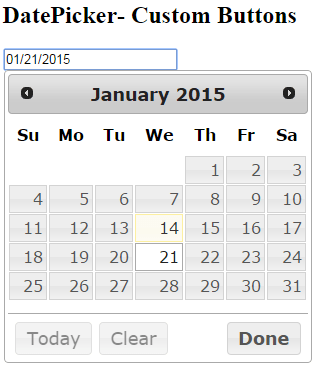
You can show the Button panel with datepicker. The default widgets of DatePicker gives you button panel with buttons Today used for selecting today's date and Done used for completing selection.
The below code will give you DatePicker with default buttons.
<script type="text/javascript">
    $("#datepicker").datepicker({
        numberOfMonths: 2,
        showButtonPanel: true
    });
</script>
You can also add your custom buttons for your specific requirements. Below function add a new button with text Clear which clears the TextBox value. It finds the button panel of the widget and HTML of new button to it.
<script type="text/javascript">
    $('#datepicker').datepicker({
    showButtonPanel: true,
    beforeShow: function (input) {
    setTimeout(function () {
        var buttonPane = $(input)
        .datepicker("widget")
        .find(".ui-datepicker-buttonpane");

    var btn = $('<button class="ui-datepicker-current ui-state-default
            ui-priority-secondary ui-corner-all" type="button">Clear</button>');
    btn.unbind("click")
    .bind("click", function () {
        $.datepicker._clearDate(input);
    });
    btn.appendTo(buttonPane);

    }, 1);
    }
    });
</script>
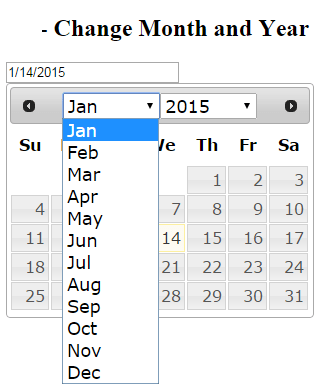
Change Year and Month
You can add functionality to select any month and year easily without navigating all dates. jQuery widget gives you changeMonth and changeYear attributes to achieve this functionality.
Below code shows you how to add Year and Month dropdown.
<script type="text/javascript">
    $("#datepicker").datepicker({
        changeMonth: true,
        changeYear: true
    });
</script>
Posting DatePicker value
When you post your form values to some controller HttpPost Action method, the value for DatePicker will be binded and available in post action method as model property. You can also use Data Anotation validations with values selected by datepicker.
DatePicker onSelect Event
You might want to change some values of other form field or add / remove some css on selection of specific date. You can use onSelect event of DatePicker. For example you want to calculate the Age of person after selecting Date of Birth and display the age in different field.
$(document).ready(function () {
$("#DOBDatePicker").datepicker
({ format: 'dd/mm/yyyy',
	todayHighlight: true,
	autoclose: true,
	onSelect: function(value, ui) {
        var today = new Date();
        var age = today.getFullYear() - ui.selectedYear;
        $('#age').val(age);
    },
    changeMonth: true,
    changeYear: true
});
})
Blog Search
-
Building Scalable Applications: Microservice Architecture Challenges
-
The Paradigm Shift to Low-Code and No-Code Development in Software Engineering
-
How To Use AutoMapper in ASP.NET Core Web API
-
Generate Log using Serilog And Seq In ASP.NET Core MVC 6
-
How to Setup CORS Policies in ASP.NET Core Web API

