Angular Nested Component with Input and Output decorator
This blog helps you to create a nested angular nested component and pass data between parent and child components. For passing data you will use Input() and Output() decorator.
For this tutorial, you will create an Angular Component called "Products" and a nested component with the name "Product-Details". Products component shows a list of products and each list item of the product will have separate SalesRating and Local Sales Details coming from the nested component.
-
Create Product Angular Component
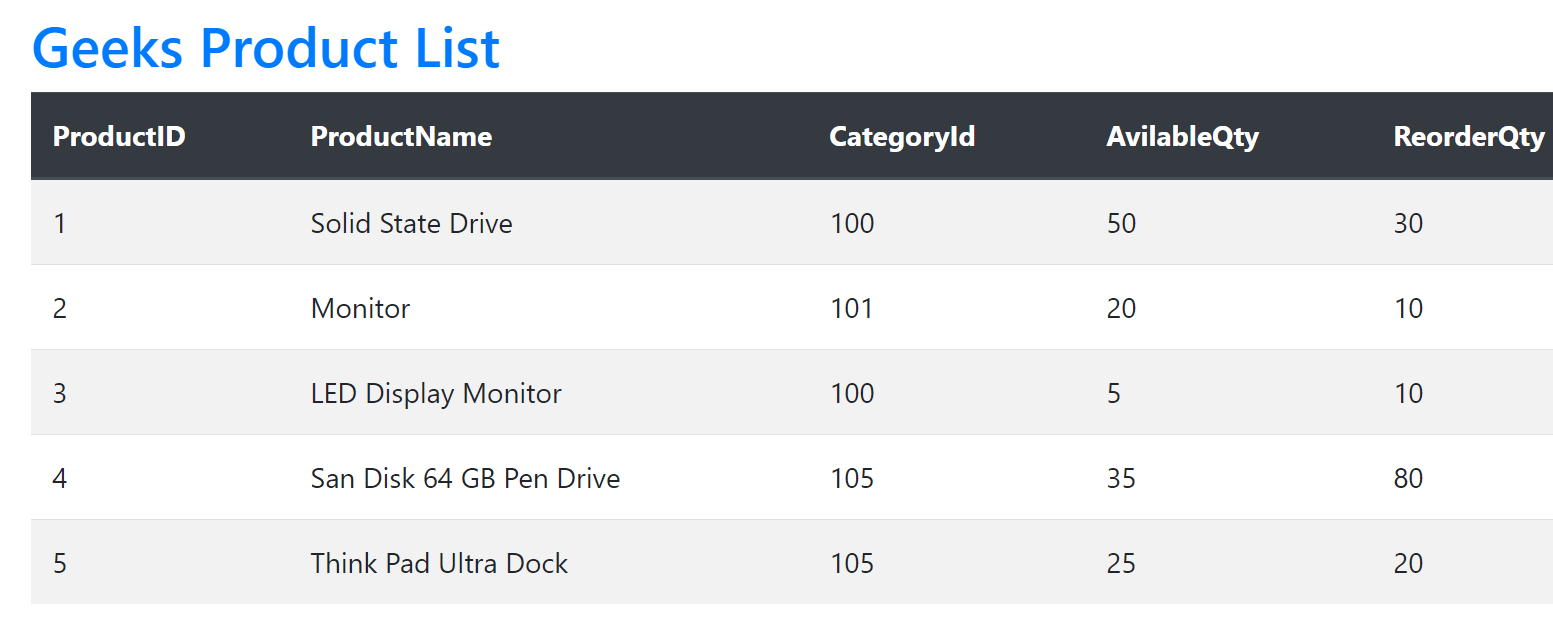
The product component is an Angular Component that displays a list of Products defined as an array in the TypeScript file of the component. This component is going to be a parent component for this tutorial. Each product item reads data from the nested component. You can visit creating angular component.
After creating the Product component it should look like.
-
Create Nested Angular Component
In this step, you will create an Angular component that will act as a child component of the Product component. Create a Product-Details component using the following command.
ng g c Product-Details
This tutorial using Visual Studio Code and NodeJS command prompt. If your development environment is not set up with Visual Studio Code then please visit - Angular With Visual Studio Code.
This command is executed on the NodeJS command prompt and generates the Product-Details component with the following files under the src folder.
- product-details.component.ts
- product-details.component.html
- product-details.component.css
- product-details.component.ts
-
Parent Component Property
In this step, you will create the property of Products that is the parent Component. The value of this property will be passed to the child component. The child component will read the property and define SalesRating logic and return string. The value of SalesRating will be shown on the parent component.
Open products.component.ts file and update product array with additional property with name "SalesRating" as shown below.
products : any[] =[ { "ProductID" :1, "ProductName": "Solid State Drive", "CategoryId":100, "AvilableQty":50, "ReorderQty":30, "SalesRating":4.5 }, { "ProductID" : 2, "ProductName": "Monitor", "CategoryId":101, "AvilableQty":20, "ReorderQty":10, "SalesRating":4 }, { "ProductID" : 3, "ProductName" : "LED Display Monitor", "CategoryId":100, "AvilableQty":5, "ReorderQty":10, "SalesRating":3.5 }, { "ProductID" : 4, "ProductName": "San Disk 64 GB Pen Drive", "CategoryId":105, "AvilableQty":35, "ReorderQty":80, "SalesRating":4 }, { "ProductID" : 5, "ProductName": "Think Pad Ultra Dock", "CategoryId":105, "AvilableQty":25, "ReorderQty":20, "SalesRating":4.5 } ] -
Angular Input() decorator
This decorator is used as input parameter and gives configuration metadata. This decorator tells to the child component that it's value is coming from parent component. This recieves data before ngOnInit() so you can use it in ngOnInit() method of component.
In Angular Input() decorator is used specially for communication from parent component to child component. For other communications like one component to other you can use @ViewChild or Angular Services.
Import Input and OnChanges from Angular Core by updating product-details.component.ts with the following code.
import { Component, OnInit, OnChanges, Input } from '@angular/core';Open product-details.component.ts and add below code to define Input() decorator - SalesRating.
@Input() SalesRating:number = 3.5;Define a local variable with name _salesRating.
_salesRating: string = 'Default';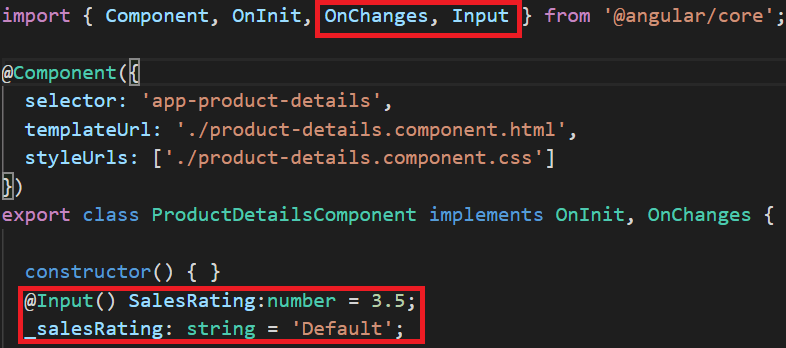
For this tutorial, you will pass the value of SalesRating from the parent component which is defined as a number.
-
ngOnChanges() of Child component
In this step, you will use ngOnChanges event of child component that is product-details component. This event will use "SalesRating" which is Input decorator value passed by parent component. Child component will perform its own logic and set the value that is to be displayed on the parent component.
Open product-details.component.ts and add the following code to it.
ngOnChanges() : void{
    if(this.SalesRating == 3.5){
        this._salesRating = 'Good';
    } else if (this.SalesRating == 4.0){
        this._salesRating = 'Very Good'
    } else if(this.SalesRating == 4.5){
        this._salesRating = 'Excellent'
    } else {
        this._salesRating = 'Undefined'
    }
 }
You can see the entire code of product-details.component.ts here.
-
Display child component value on Parent
The value set for _salesRating in the child component that is product-details.component.ts can be used in the parent component.
Open product-details.component.html and add below code to it. This renders value calculated in TypeScript for _salesRating.
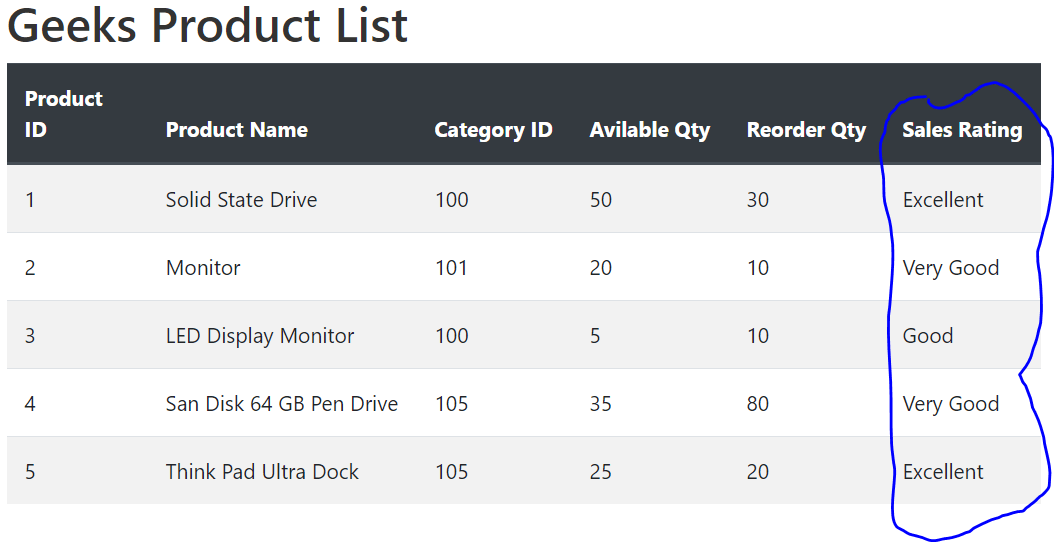
<div>
    {{_salesRating}}
>/div>
Now your child component is ready to use in the parent component that is Products. Open products.component.html and update table with an additional column with name "SalesRating".
<div class="container">
<br>
<br>
<h2>Geeks Product List</h2>
<div class="table-responsive">
<table class="table table-striped" *ngIf='products && products.length'>
    <thead class="thead-dark">
        <tr>
            <th>Product ID</th>
            <th>Product Name</th>
            <th>Category ID</th>
            <th>Avilable Qty</th>
            <th>Reorder Qty</th>
            <th>Sales Rating</th>
        </tr>
    </thead>
    <tbody>
        <tr *ngFor='let product of products'>
            <td>{{product.ProductID}}</td>
            <td>{{product.ProductName}}</td>
            <td>{{product.CategoryId}}</td>
            <td>{{product.AvilableQty}}</td>
            <td>{{product.ReorderQty}}</td>
            <td>
                <app-product-details
                    [SalesRating]='product.SalesRating'>
                </app-product-details>
            </td>
        </tr>
    </tbody>
</table>
<div>
</div>
This looks like the following image with an added column and its value defined in the child component.
-
Angular @utput() Decorator
You can use @utput() decorator to pass data from child component to parent component. An @Output should be initialized in Angular EventEmitter with values flowing out of the component as events.
For this demo you will pass products local sales report from product-details to products component with click of button. For this you will use @Output property and EventEmitter that emits string to parent component.
Open child component that is product-details.component.ts and following code to it.
import { Component, OnInit, OnChanges, Input, Output, EventEmitter } from '@angular/core';Add @Output property with name GetLocalSales and EventEmitter
@Output() GetLocalSales: EventEmitter<string> = new EventEmitter<string<();
Open product-details.component.html and update it with following code.
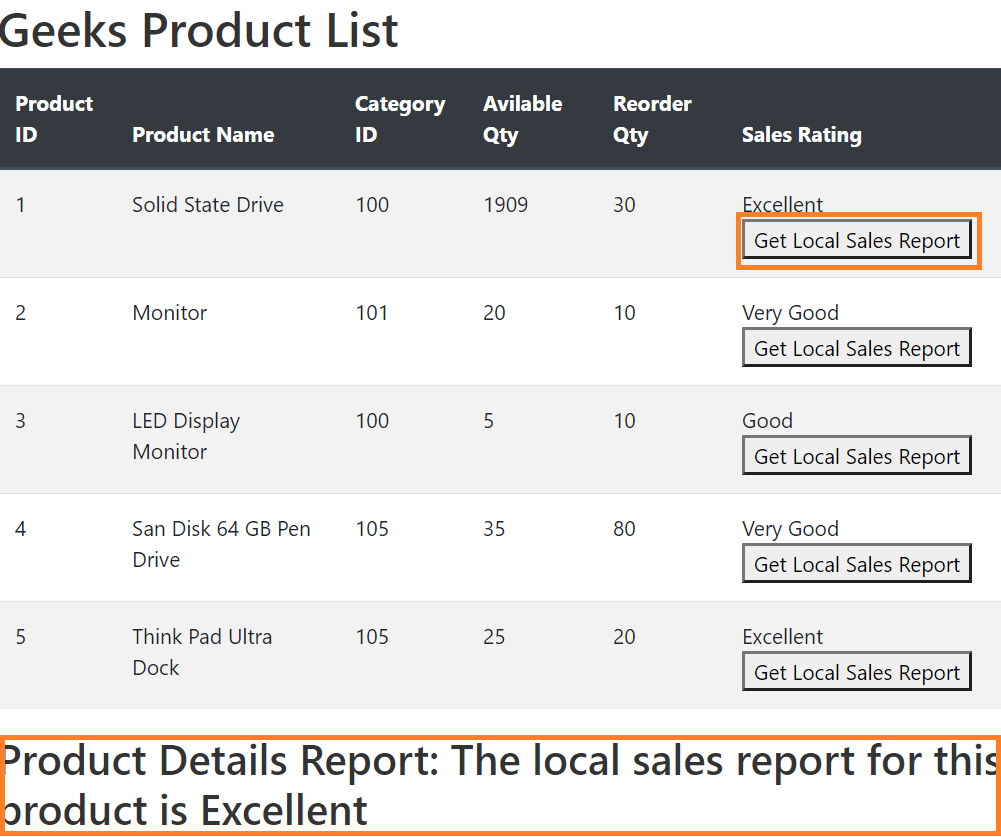
<div>
    {{_salesRating}}
        <button (click)="onClick();">Get Local Sales Report</button>
 </div>
Add onClick event in product-details.component.ts to emit string message to parent component.
onClick():void{ this.GetLocalSales.emit(`The local sales report for this product is ${this._salesRating}`); } -
Receieve emitted message at Parent component
Now you can configure the parent component to receive emitted messages at the parent component. Open parent component file that is products.component.html and updates below code to include nested component.
<table class="table table-striped" *ngIf='products && products.length'>
<thead class="thead-dark">
    <tr>
        --column headers
    </tr>
</thead>
<tbody>
    <tr *ngFor='let product of products'>
        --other column values
        <td>
            <app-product-details [SalesRating]='product.SalesRating'
                    (GetLocalSales)='onGetLocalSalesReport($event)'>
            </app-product-details>
        </td>
    </tr>
</tbody>
</table>
This code is firing a button click event written in the child component. Child component will emit a string message to the parent component. Add a placeholder to show this emitted message in products.component.html
<div>
    <h3>
        {{messageFromNestedComponent}}
    </h3>
</div>
You can see entire code of products component at Github Angular Product Component.
Open products.component.ts and add below code.
messageFromNestedComponent = '';
   onGetLocalSalesReport(message:string) : void {
      this.messageFromNestedComponent = 'Product Details Report: ' + message;
 }
Run your Angular app and redirect to http://localhost:4200/products and it should be able to communicate from parent to child.

Blog Search

-
Building Scalable Applications: Microservice Architecture Challenges
-
The Paradigm Shift to Low-Code and No-Code Development in Software Engineering
-
How To Use AutoMapper in ASP.NET Core Web API
-
Generate Log using Serilog And Seq In ASP.NET Core MVC 6
-
How to Setup CORS Policies in ASP.NET Core Web API