

In part seven we ran our image on ECS with very little ceremony. Many companies, though, standardise on Kubernetes: it runs the same way on AWS, other clouds and on-premises, and it has a vast ecosystem of tools. On AWS, managed Kubernetes is Amazon EKS. This part deploys the same orders-api image to EKS, explains the moving parts, and compares the two platforms honestly so you can choose for the right reasons.
What EKS manages and what you manage
A Kubernetes cluster has two halves:
- The control plane: the API server, scheduler, controllers and the
etcddatabase. EKS runs this for you across multiple AZs, patches it and keeps it available. You pay a flat hourly fee per cluster. - The data plane: the machines your pods run on. You choose how these are provided:
- Managed node groups — EC2 instances that EKS provisions and helps you upgrade.
- Karpenter — an open-source autoscaler that launches right-sized EC2 instances on demand based on pending pods. It is now the common choice for efficient scaling.
- Fargate profiles — run pods without nodes, with some feature limits.
- EKS Auto Mode — AWS manages compute, networking and storage components for you, which narrows the operational gap with ECS.
Whichever you choose, you still own the Kubernetes version upgrades (on a regular cadence), the add-ons you install, and every manifest you deploy.
Creating a cluster
Clusters are infrastructure, so we build them in Terraform with the community EKS module, reusing the VPC from part four. A minimal cluster with a managed node group looks like this:
module "eks" {
  source  = "terraform-aws-modules/eks/aws"
  version = "~> 21.0"

  name               = "orders-${var.env}"
  kubernetes_version = var.kubernetes_version
  vpc_id             = module.vpc.vpc_id
  subnet_ids         = module.vpc.private_subnets

  endpoint_public_access                   = true
  enable_cluster_creator_admin_permissions = true

  eks_managed_node_groups = {
    general = {
      instance_types = ["t3.large"]
      min_size       = 2
      max_size       = 4
      desired_size   = 2
    }
  }
}
Choose a Kubernetes version that is in EKS standard support; older versions move to paid extended support and eventually must be upgraded. Once the cluster exists, connect kubectl:
aws eks update-kubeconfig --name orders-dev --region ap-south-1
kubectl get nodes
Access: who can talk to the cluster
EKS uses access entries to map IAM principals to Kubernetes permissions. Your admin role gets cluster-admin; your CI deploy role gets only the permissions needed to update workloads in one namespace. This replaces the older aws-auth ConfigMap, which was easy to break with a typo.
For pods that call AWS APIs, use EKS Pod Identity: associate an IAM role with a Kubernetes service account, and pods using that service account receive temporary credentials. It is the Kubernetes equivalent of the ECS task role from part seven, and it means no AWS keys inside your cluster either.
Deploying the application
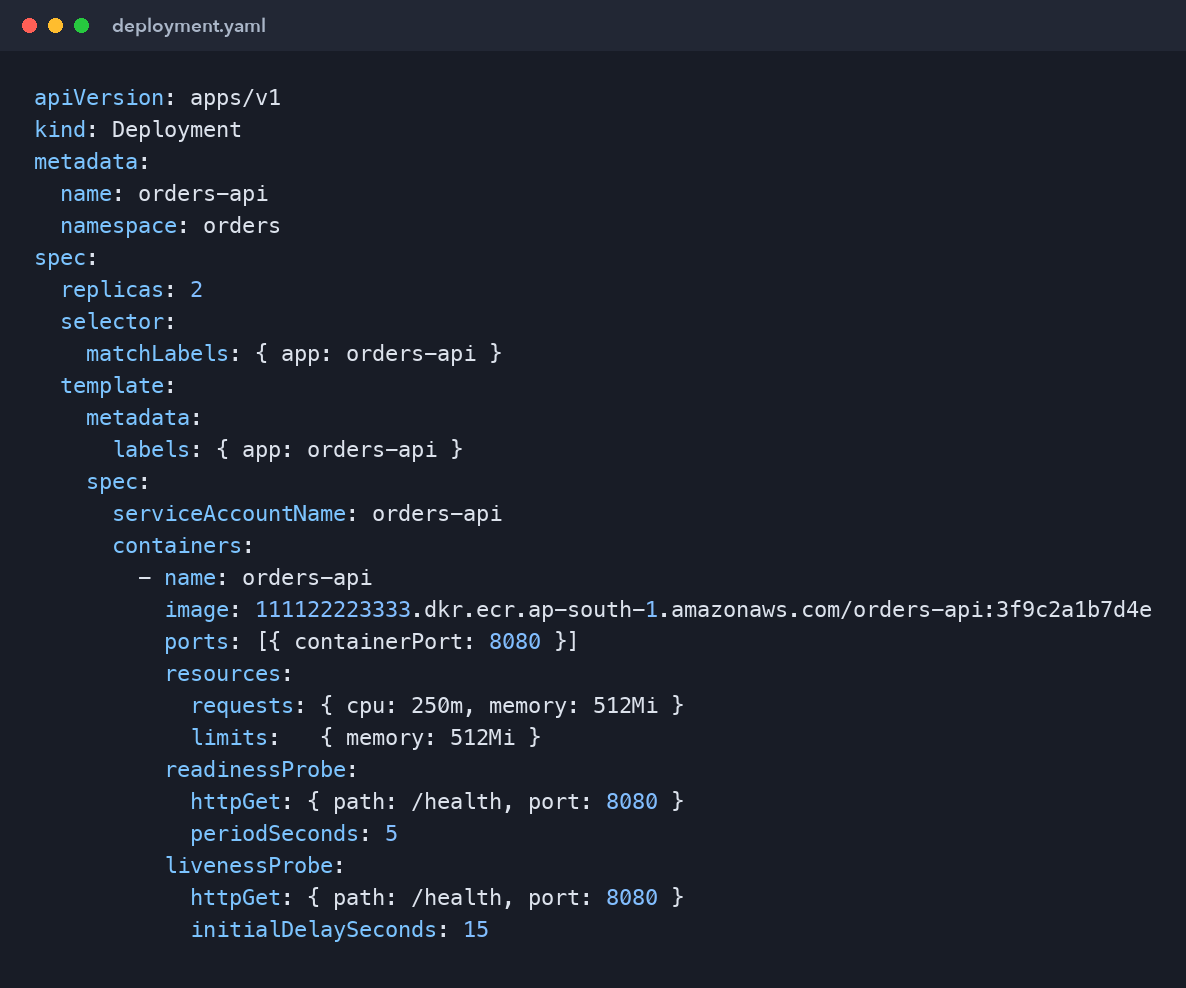
Kubernetes describes desired state in YAML manifests. Our API needs three objects: a Deployment (runs and updates pods), a Service (stable internal address) and an Ingress (external HTTP routing through a load balancer).
apiVersion: apps/v1
kind: Deployment
metadata:
  name: orders-api
  namespace: orders
spec:
  replicas: 2
  selector:
    matchLabels: { app: orders-api }
  template:
    metadata:
      labels: { app: orders-api }
    spec:
      serviceAccountName: orders-api
      containers:
        - name: orders-api
          image: 111122223333.dkr.ecr.ap-south-1.amazonaws.com/orders-api:3f9c2a1b7d4e
          ports: [{ containerPort: 8080 }]
          resources:
            requests: { cpu: 250m, memory: 512Mi }
            limits:   { memory: 512Mi }
          readinessProbe:
            httpGet: { path: /health, port: 8080 }
            periodSeconds: 5
          livenessProbe:
            httpGet: { path: /health, port: 8080 }
            initialDelaySeconds: 15
Three fields deserve attention:
- Resource requests tell the scheduler how much CPU and memory a pod needs. Without them, pods get packed onto nodes unpredictably and autoscalers cannot make good decisions. A memory limit equal to the request prevents one pod from starving its neighbours.
- The readiness probe decides when a pod receives traffic. During a rolling update, new pods only join the Service once they report ready, the same guarantee the ALB health check gave us on ECS.
- The liveness probe restarts a pod that has hung. Keep it more forgiving than readiness so a slow start does not cause a restart loop.
The Service and Ingress complete the picture. With the AWS Load Balancer Controller installed in the cluster, an Ingress with ingressClassName: alb provisions an Application Load Balancer automatically and routes traffic straight to pod IPs.
Packaging with Helm
Hand-editing YAML per environment does not scale. Helm packages manifests into a chart with templated values, so dev and prod differ only in a values file (replica count, image tag, resource sizes). Most third-party software you install on a cluster, including the Load Balancer Controller and monitoring stacks, ships as Helm charts too.
Deploying from the pipeline: push or pull
There are two ways to roll out a new image:
- Push: the GitHub Actions job assumes the deploy role, runs
aws eks update-kubeconfig, thenhelm upgrade --installwith the new image tag. Simple and familiar. - Pull (GitOps): a controller such as Argo CD or Flux inside the cluster watches a Git repository of manifests and applies changes itself. The pipeline's only job is to commit the new image tag to that repository.
GitOps gives you an auditable history of every change to the cluster, automatic drift correction and easy rollback (revert a commit). It is the common choice for teams running many services on Kubernetes.
ECS or EKS: an honest comparison
| Consideration | ECS (Fargate) | EKS |
|---|---|---|
| Learning curve | Low | High |
| Operational effort | Minimal | Upgrades, add-ons, node management |
| Portability | AWS only | Any Kubernetes environment |
| Ecosystem | AWS integrations | Huge open-source ecosystem |
| Control plane cost | None | Hourly per cluster |
| Best fit | Small teams, AWS-focused | Platform teams, many services, multi-cloud |
Choose ECS when you want to ship containers on AWS with the least operational work. Choose EKS when your organisation already invests in Kubernetes, needs its ecosystem, or values portability. Both are valid production platforms; knowing both makes you far more employable.
Key takeaways
- EKS runs the control plane; you choose the data plane and own upgrades and add-ons.
- Use access entries for humans and CI, and Pod Identity for workloads calling AWS.
- Always set resource requests and readiness probes; they make scheduling and rollouts safe.
- Package with Helm and consider GitOps for auditable, self-healing deployments.
What's next
Running services on ECS and EKS is only half the job. In part nine we make them observable with CloudWatch logs, metrics and alarms, plus Prometheus and Grafana for the Kubernetes path.
Comments (0)
No comments yet — be the first to share your thoughts.